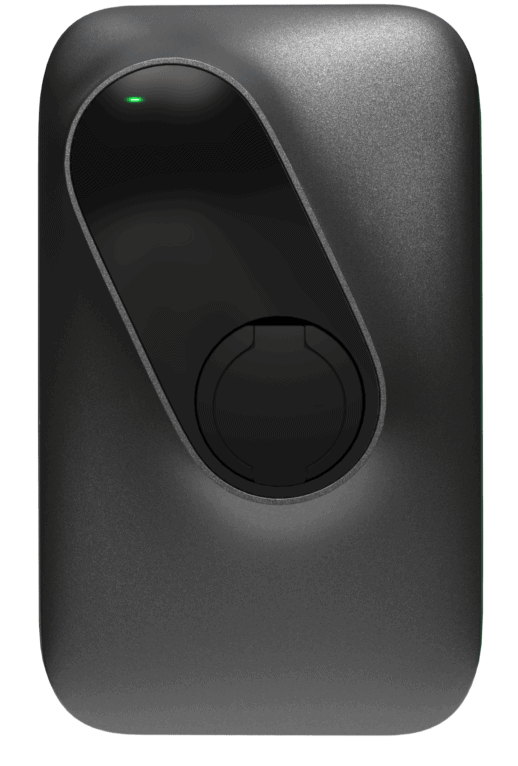
Connect Etrel to KotiCharge
Follow these detailed instructions to configure your Windows network settings, access the Etrel web interface, and connect the charger to KotiCharge.
Important prerequisite
If the charge point was previously connected to the internet using DHCP, you will need to factory reset the charge point by pressing and holding the reset button (located close to the LAN port in the side opening of the charger).
Change your network settings
You need to change the network settings of your computer to match the charge point's local IP network.
- Click on the Internet/Network icon in the bottom-right corner of your computer screen and open Network & Internet Settings.
- Select Change adapter options.
- Find your Ethernet adapter, right-click on it, and select Properties.
- Find Internet Protocol Version 4 (TCP/IPv4), select it, and click Properties.
Select "Use the following IP addresses" and enter the following values:
- IP address: 192.168.1.x
(where x is any number between 1 and 249) - Subnet Mask: 255.255.255.0
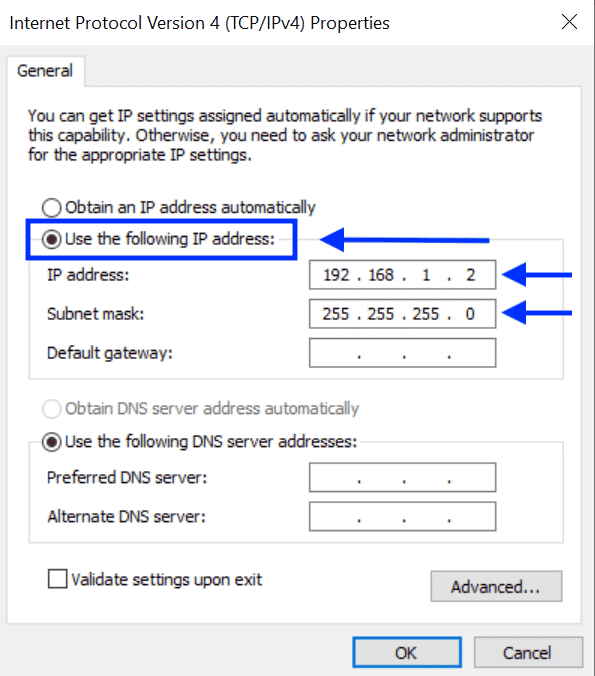
Click "OK" and close the window.
Log in to the WebUI
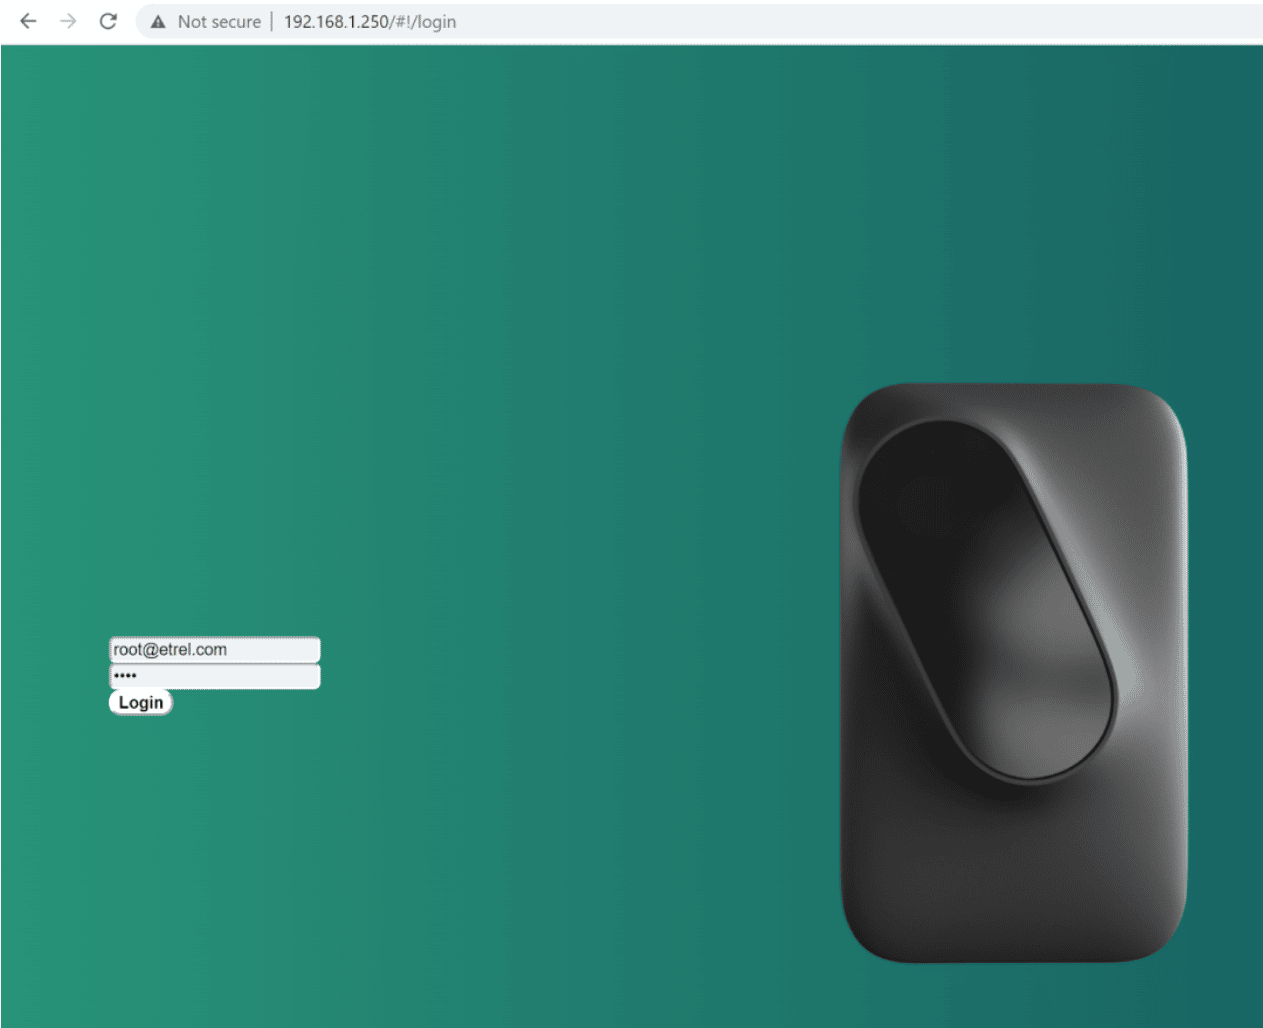
Open your web browser and enter the IP address into the address bar: 192.168.1.250
Log in with the following default credentials:
- Email: root@etrel.com
- Password: toor
Set the OCPP URL
In the Web Interface, press the menu button in the top-left corner and navigate to "Connectivity".
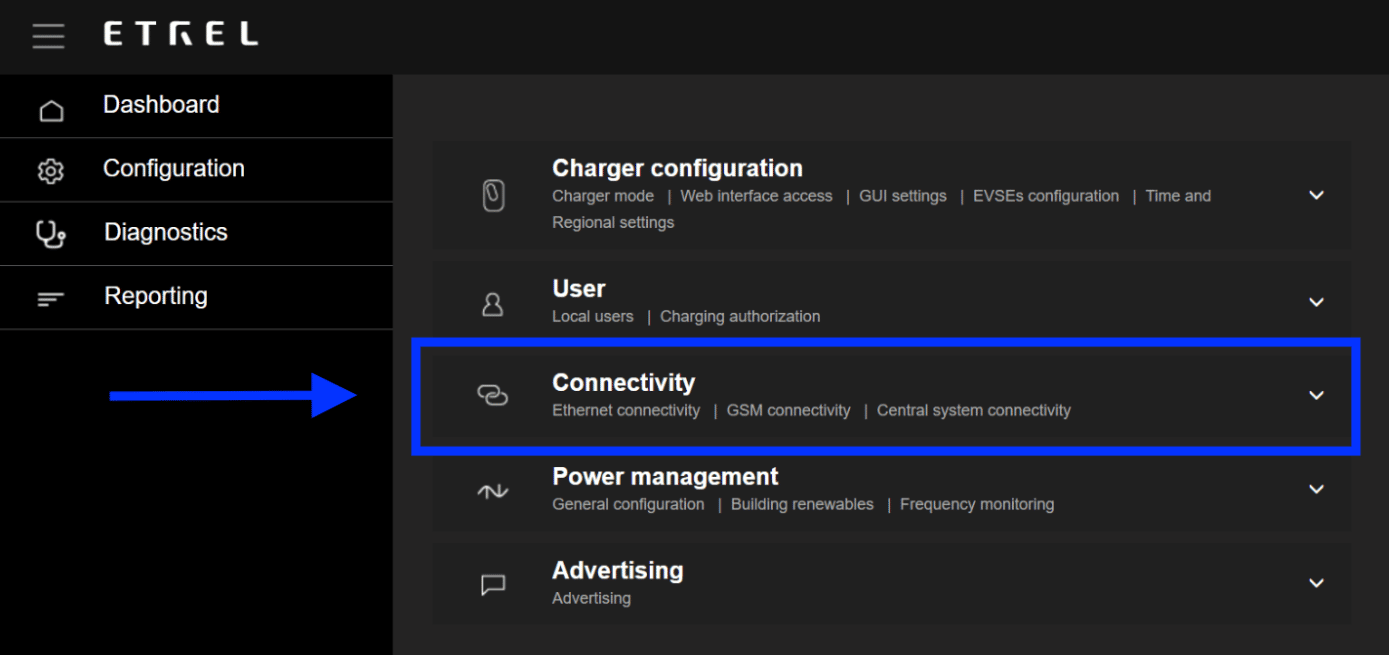
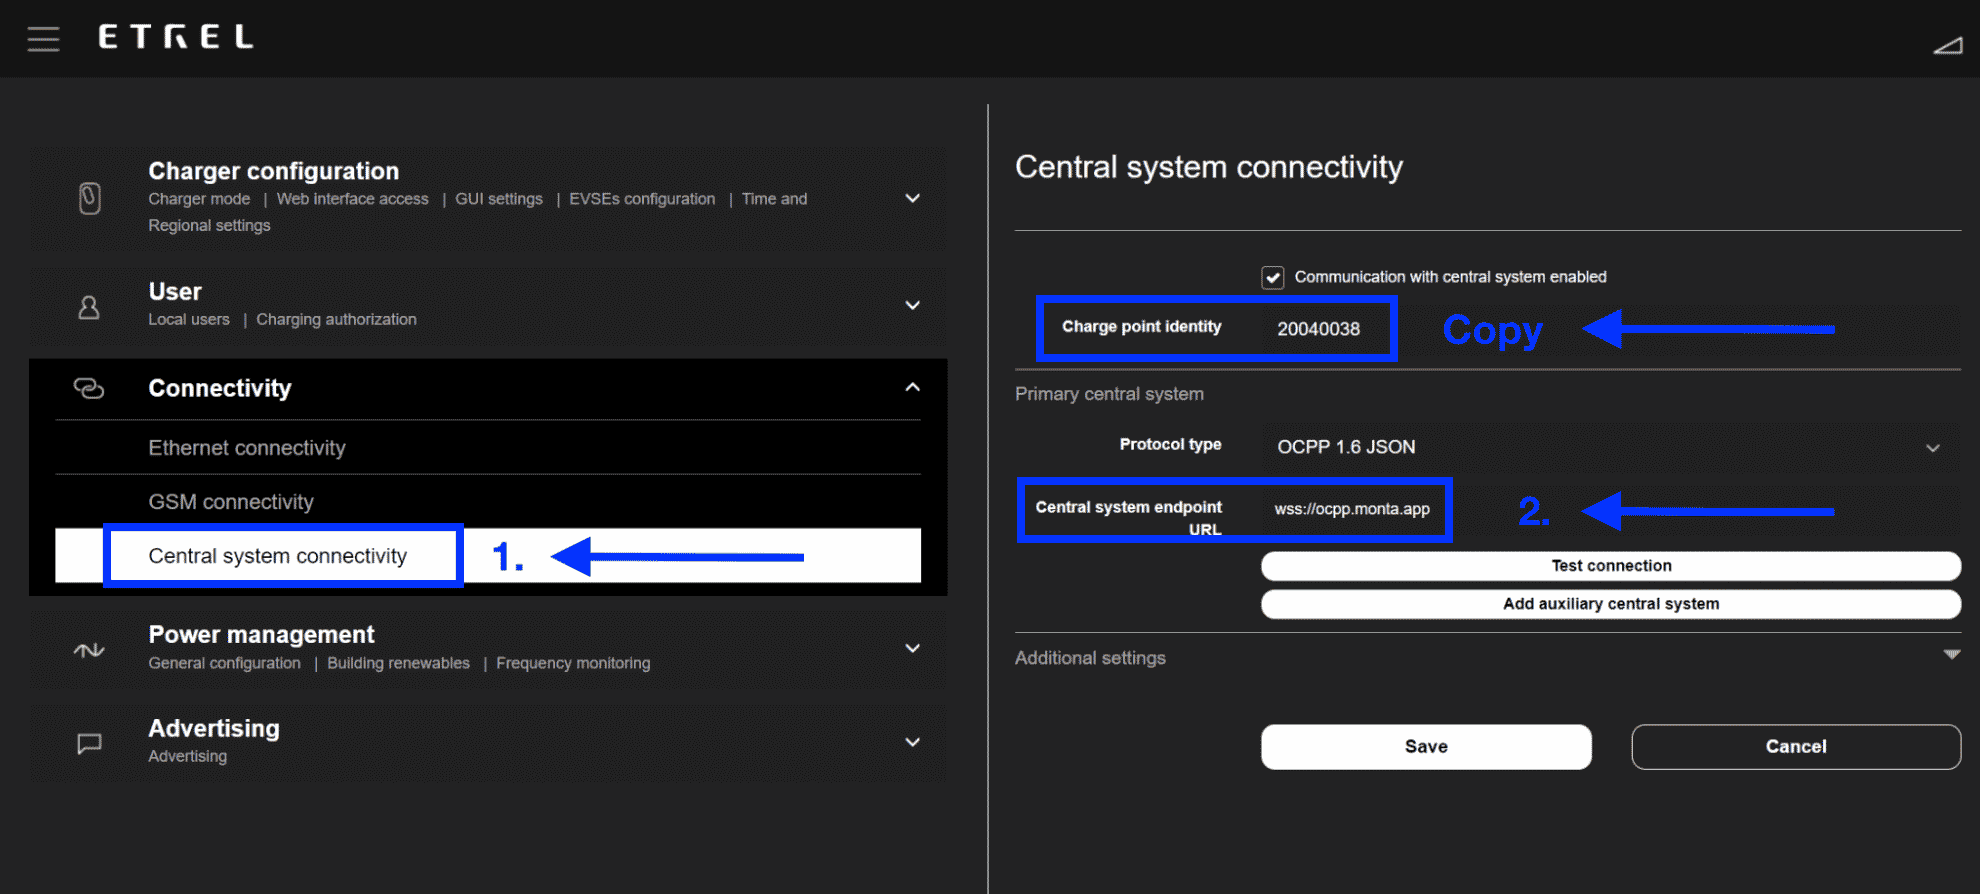
Under the Connectivity tab, select "Central system connectivity".
In the "Central system endpoint URL" field, paste the KotiCharge URL:
wss://ocpp.koticharge.link/ Note: We recommend copying the Charge point identity shown on this screen. This is the serial number of your charge point and you will need to provide it to KotiCharge later.
Restart the charger
Under "Connectivity", select the "Ethernet connectivity" tab.
On the right side, ensure there is a check mark on DHCP and DNS in the IPv4 section. Click "Save".
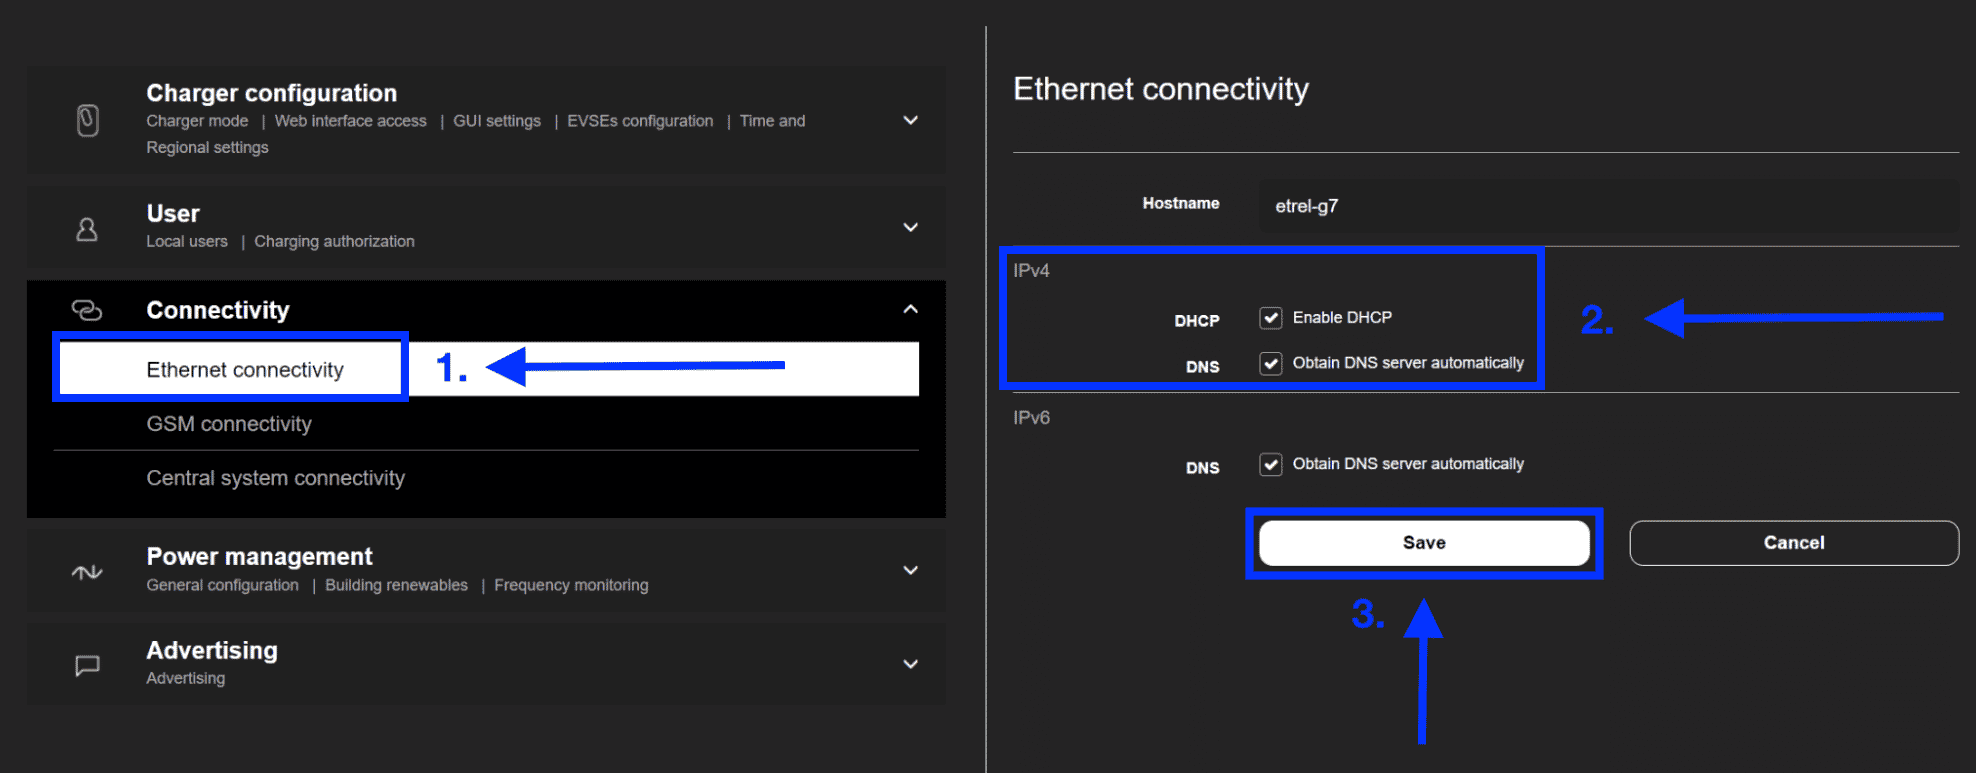
Now you need to restart the charge point.
You can do this directly in the Web UI, or by pressing the physical reset button for a few seconds on the charge point itself and selecting the 'Restart Charger' option on the screen.
Call KotiCharge for Testing
Call KotiCharge to inform us of your charger's ID so we can activate it in our system and perform a charging test.
Charger setup is only complete once the charging test has been performed successfully. Please do not leave the site before that.